Key Takeaways
-
Respect your surgeon’s schedule when deciding on taking your first shower post-liposuction, as adhering to the advised waiting time can significantly minimize infection risk and promote healing.
-
Examine your incision sites prior to showering and contact your surgeon if there is excessive redness, drainage, or any other changes.
-
Use gentle showering techniques, lukewarm water, and low water pressure to avoid irritation and protect sensitive surgical sites.
-
Continue wearing your compression garment as instructed, take it off only when you’re told to, and make sure it is clean and dry before putting it back on after your shower.
-
Pat the body dry with a clean towel, soft if possible, and let incisions air dry before re-dressing.
-
Be alert to complications such as excessive swelling or severe pain and call your healthcare provider immediately if you develop any concerns.
Showering after liposuction is waiting until your doctor gives you the OK, which is usually 24 to 48 hours post surgery. Fresh water keeps the area free of bacteria and reduces the chance of infection.
Apply gentle soap, and don’t rub. Hot water and direct streams should be avoided on the treated areas.
The following sections will discuss safe showering practices and how to treat your skin.
The First Shower
Your first shower post-liposuction is crucial not just for cleanliness, but for recovery. Everyone’s experience will vary depending on the procedure, surgeon instructions, and how your body learns to recover. Being careful at this stage decreases the risk of infection and promotes healing.
1. Surgeon’s Timeline
Here, surgeons will instruct when to take your first shower. This may be a minimum of 24 hours post surgery but oftentimes longer, depending on how large of an area is treated and your general health. Adhere to these guidelines as healing times are individual.
Maintaining this schedule minimizes infection and prevents deterioration of your wounds. If you’re uncertain or your recovery feels different from what we’ve described, contact your care team for guidance.
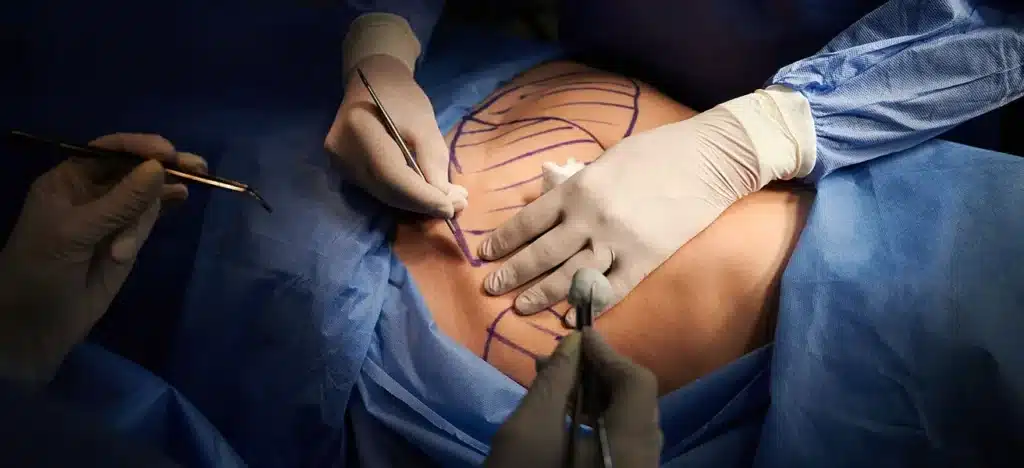
2. Incision Status
Check your incision sites prior to showering. Check for redness, swelling, or abnormal discharge. If you notice anything strange like heavy yellow drainage or skin that is hot to the touch, do not shower until you consult with your surgeon.
This check prevents you from getting infections or irritating healing skin. Clean incisions assist in accelerating recovery and preventing the area from becoming further swollen.
3. Garment Protocol
Compression garments are typically required post-liposuction. Leave it on unless your surgeon specifically tells you to remove it for a shower. Post-shower, ensure the piece is warm and pristine before re-donning it.
Wearing as directed helps with swelling and keeps the treated area supported. A fresh piece of clothing reduces the chance of chafing or infection.
4. Liposuction Type
Different liposuction techniques might translate to different showering directions. For instance, tumescent lipo may require an extended shower delay, while smaller procedures may permit earlier showers.
Check with your surgeon regarding any special rules for your specific procedure. Customize your schedule accordingly and never utilize harsh, rough soap.
5. Personal Healing
Your body’s rate of healing is important. If you’re weak or your wounds are sensitive, modify your shower duration and method. Apply lukewarm water, under no pressure, and do not rub incision sites.
If you’re wiped out after the shower, at least have time to rest. Everyone’s healing is different, so take it easy with yourself.
Showering Technique
Post-liposuction, showering requires extra caution. It’s important to maintain the cleanliness of surgical sites and reduce the risk of infection without stressing the body or skin. Shower gently to avoid injuring healing tissue.
A handheld showerhead grants you more control over the water flow and pressure. This allows you to rinse areas without having scalding water directly strike the lesions. Relax your body into a comfortable position. Wash just the areas you need to keep clean and dry, which reduces how long your skin is wet.
Keep showers under 5 to 10 minutes to reduce swelling and exposure to moisture. Pat dry with a clean towel, do not rub, and avoid irritating the skin. Having someone nearby for assistance is generally safer, particularly if you feel faint.
Water Temperature
Make water tepid for every post-operative shower. Hot water can increase swelling and irritation of the skin. Make a point to check the water first with your hand or a thermometer if necessary.
Lukewarm water isn’t as likely to aggravate or add blood flow to the lesion. If you’re puffy or hurting, cooler water can soothe that sensation. Never douse it in water that’s too hot or too cold. Both temperatures inhibit healing.
Water Pressure
-
Set the showerhead to the lowest setting.
-
Keep the showerhead at a mild angle.
-
No high-pressure jets because they may open or stress wounds.
-
Use a soft sponge or washcloth for gentle cleansing.
-
Do not use loofahs, brushes, or any abrasive pads.
-
Concentrate on letting incisions be run over, not sprayed by water.
-
Make it quick so your skin isn’t rinsed of its natural oils.
Cleansing Agents
-
Use only surgeon-approved mild cleansers.
-
Avoid any product with strong scents or chemicals.
-
Opt for liquid soap instead of bar soap to reduce bacterial hazards.
-
Antibacterial soap is fine if cleared by your doctor.
-
Skip exfoliating products until told otherwise.
-
Never scrub or rub the wound. Just pat gently to wash.
-
Rinse off any soap without letting residue build up.
Body Position
Whether you’re standing or sitting, find a position where you feel stable. Use a slip mat in the shower to prevent falls. If you’re feeling weak or light-headed, sit in a shower seat or on a solid stool.
Keep loose and safe, so you don’t tense up around your wounds. A friend in close proximity can assist you with dressings or provide a safe exit. Never bend or twist too much. Showers can’t be rushed, but they shouldn’t be too long either.
If you require a breather, stop and relax.
Garment Management
Compression garments are an essential component of post-lipo care. They protect wounds and prevent fluid accumulation. Most are required to wear this compression garment for 4 to 6 weeks. Some were instructed to keep it on, aside from showers, for a minimum of 3 weeks.
If the fat was extracted from the calves or ankles, support hose are recommended to be worn for roughly 6 weeks. Garment type and duration of wear will vary depending on your body, the location treated, and your physician. Sometimes after the initial few weeks in a medical-grade garment, they will have you transition to something softer, like a Spanx-type piece, for continued compression.
In some instances, a wrap can be required for 3 to 4 weeks to provide additional support in healing. Maintaining the cleanliness of the garment is essential to comfort and health. Every garment has its own washing procedures, so refer to the tag or care sheet that comes with it.
Overall, hand wash with mild soap and cool water. No bleach or strong cleaners. Allow the garment to air dry flat to maintain the shape and close fit. If you throw it in the dryer, it can shrink or ruin the fabric and be less helpful for support.
For some, it is convenient to have a backup so you are wearing one while the other is drying. If it gets dirty or stinky, wash it immediately to prevent bacteria from forming. Swapping out worn or damaged garments is crucial. If you notice rips, loose seams, or it feels too loose or tight, swap it out.
An ill-fitting garment won’t compress swelling or facilitate repair. Some have to purchase a smaller size a week or so later as swelling subsides and the body shifts into its new shape. Make sure that the garment lies smooth on the skin and doesn’t bunch up or dig in, as it can bruise the skin or leave impressions.
Pat your skin dry with a soft towel after showering and immediately re-don the garment. This assists in keeping swelling down and supports the skin during the healing process. Don’t leave the garment off for long unless your doc approves. This step is crucial to reduce the likelihood of issues and keep you on schedule for success.
|
Step |
Action |
Notes |
|---|---|---|
|
Remove garment |
Take off before shower |
Only remove for showers |
|
Wash garment |
Hand wash with mild soap, cool water |
Air dry flat, avoid harsh cleaners |
|
Inspect garment |
Check for damage or loose seams |
Replace if worn out |
|
Reapply garment |
Put on after drying off from shower |
Wear snug, not too tight or loose |
|
Rotate garments |
Use a spare garment if possible |
Helps with daily cleaning and comfort |
Drying And Dressing
Drying and dressing after liposuction are crucial steps in determining how efficiently your skin and incisions heal. These procedures reduce the possibility of infection and increase ease. Attention is required at all times to prevent issues, particularly within the initial two weeks post-operation. No matter where you live or which liposuction you had, the right tools and methods can make a difference in results.
Patting Dry
After-shower pat your skin dry – particularly over the treated region. No rubbing or scrubbing that can pull on the skin and impede healing. Use a clean, soft towel you designated just for your post-surgery care. Coarse towels or communal towels can introduce bacteria or irritate the sensitive skin around your incision.
If you use a towel that is too rough or unwashed, bacteria can be introduced into the region and increase the likelihood of infection. Make sure incision areas are completely dry. Any moisture on the skin can become caught under them, particularly if dressings or compression garments are applied immediately.

This moisture can facilitate bacterial growth, which is the last thing you want at this point. Soft cotton or bamboo towels seem to feel best and do not irritate healing skin as much.
Air Drying
Allow your wounds or incision sites to air dry for a few minutes prior to applying new dressings. It’s a basic but vital step in drying and dressing to minimize moisture and potential risk of infection. Air drying calms the skin and keeps you from hurrying.
Don’t use a hair dryer or other heat source to hurry things along; it’ll dry out the skin too much and cause irritation. Examine your skin as you’re air drying. Be on the lookout for redness, swelling, or pus, signs that could indicate infection.
If you notice any of these, inform your doctor. During this brief wait period, examine all treated areas, as some locations might prove more difficult to spot or access by yourself.
Re-dressing Incisions
When it’s time to put on new dressings, always follow your surgeon’s advice. Cover your incisions with only sterile, medical-grade dressings. This reduces the risk of infection and promotes more rapid healing of the wounds.
Change your dressings as often as your doctor prescribes, either once or twice a day, depending on the wound and dressing. Make the dressing snug but not tight so circulation is not impeded. If you’re applying waterproof dressings, they can be useful if you need to shower or partake in aquatic therapy during your healing process.
The trick here is to maintain the wound site dry and clean. Your physician may recommend an antiseptic wash such as Hibiclens for additional bacterial defense.
Re-applying Garments
Compression garments are included in recovery after liposuction. Pull them back on after your skin has dried and dressings are placed. The suit should be tight but not feel too constricting. If it leaves a deep dent or hurts, try a size up or consult your physician.
Take a peek under the garment regularly for any redness, rash, or swelling. If you observe these, you might need to modify your wearing. Most surgeons recommend wearing these most of the day, sometimes for as long as six weeks.
Follow your doctor’s specific schedule. If you take off the garment for showers, make them quick. Five to ten minutes is ideal, particularly in the initial post-op days.
The Mind-Body Connection
Mental health plays a major role in liposuction recovery. We tend to be too fixated on the body, but the mind can alter how the body heals. Anxiety and stress are natural post-surgery feelings. Studies reveal that such emotions impede healing, diminish the immune system, and increase your vulnerability to infection.
A lot of us observe that stress exacerbates pain. If you’re stressed, your body feels it as well. This is why taking care of your mind is just as important as aftercare for your body.
Relaxation is not mere affect. Easy practices such as deep breathing or listening to soothing music or even just sitting still can assist your body heal. Relaxation techniques like guided breathing or mindfulness not only reduce stress but allow the immune system to function more optimally.
These steps you can do at home and don’t require any special implements. For instance, breathe in through your nose for four seconds, hold for four, then exhale slowly. Do this a few times a day. This can assist in reducing your heart rate and feeling less tense. If you’re nervous before the shower post-liposuction, a few deep breaths can provide relief for mind and body.
Affirmations can transform your attitude toward recovery. Think about what you’re doing to heal. Remind yourself that recovery is a journey and baby steps matter. While others prefer to repeat simple mantras, such as “I am healing more with each day” or “This pain will subside,” optimism is not about escaping pain or avoiding issues.
It’s about giving yourself a hug in words. Research indicates that optimists tend to experience less pain and recover more quickly from surgical procedures.
Bonding with other gals who’ve had liposuction or any surgery can be just the ticket. Support groups, forums online, or just a talk with friends who get it can make you less isolated. These shared stories reassure you that your anxieties are typical and that others have coped with the same fears.
This kind of support can relieve stress and provide practical advice for making it through the tough days. You may discover fresh approaches to self-care or simply take solace in knowing others have walked your path.
Potential Complications
Shower after liposuction requires care. The skin and tissue are still healing, so there are risks if you don’t take certain clear steps. Infection is the primary concern. Watch for redness, heat, discharge, and temperature above 38.3. These can manifest in and around the wound, occasionally accompanied by worsening swelling or pain.
Although severe infections are uncommon, fewer than 1 in 2,000 individuals contract them. It remains crucial to maintain wound cleanliness and protection. Wash your hands prior to contact. Avoid bathtubs or pools. Change dressings as instructed by your doctor and be sure to attend all follow-up visits.
Yet another is slow wound healing. If you notice soft scabs that flake off or drainage and swelling that persists, your wound might not be closing as quickly as it needs to. Too much water and soft scabs break down the edges of healing skin and stretch out healing time.
Use quick, gentle showers and pat the area dry. Profuse bleeding after a shower or foul smelling drainage are not normal. Report these symptoms early.
Swelling and bruising are typical post-liposuction. If you experience swelling that increases or bruises that deepen or spread, it could be a sign that something more serious is afoot. Just be sure to monitor the wound frequently!
If pain worsens instead of improves or you feel dizzy or lightheaded when showering, pause. This can occur in the initial days post-surgery. Avoid complications. Sit down on a shower stool or have someone nearby until you feel stable.
Itching is another one they experience. It’s natural as nerves and skin heal, but scratching tugs at the scab and stymies progress. Keep the site clean and dry and notify your doctor if the itching becomes too intense or if you develop a rash.
A few signs indicate more serious issues ahead. Be on the lookout for spreading redness, fever, heavy bleeding, offensive drainage, or unremitting pain. These imply you need to phone your doctor immediately.
Scabs and small scars may take months to transform and fade, so continue wound care for optimal outcome.
|
Complication |
Signs to Watch For |
|---|---|
|
Infection |
Redness, warmth, pus, fever >38.3°C, swelling |
Slow healing, soft scabs, drainage, swelling that won’t go away.
Dizziness
Lightheadedness, feeling faint, unsteadiness
Too much moisture
Soft scabs, tissue maceration, wound remains open
Serious complication
Heavy bleeding, bad drainage, increased pain
Conclusion
Showering after liposuction requires attention and definite stages. Clean skin facilitates healing. Lukewarm water feels best on sore spots. Light soap does the trick nicely. Let your skin air dry or pat with a soft towel. Loose clothes prevent friction and provide soothing relief. Others experience post-surgical stress or anxiety. Slow breathing or short walks will help calm the mind. Watch out for red skin, hard swelling or pain. They can indicate trouble. A quick phone call to a physician can prevent larger complications. Healing is different for everybody. Candid conversations with your care team keep you on course. For additional advice, consult your doctor or nurse. Your voice and comfort come first in recovery.
Frequently Asked Questions
When can I take my first shower after liposuction?
Generally, most surgeons will advise waiting 24 to 48 hours after liposuction to shower. As with anything, check with your doctor, as recommendations can vary depending on your particular procedure and healing.
What is the safest way to shower after liposuction?
Apply lukewarm water and a mild, fragrance-free soap. Don’t scrub directly on the treated areas. Let the water run down your body, and do not aim at incisions.
Should I wear my compression garment while showering?
No, take off your compression garment before you shower. Don’t get it wet. Put it back on as soon as you towel off, unless your doctor says otherwise.
How should I dry and dress after showering?
Carefully towel dry your skin. Do not scrub on the treated areas. Slip your clean compression garment back on as soon as your skin is dry.
Can showering affect my recovery or results?
Showering after liposuction is important as proper showering supports healing by keeping wounds clean and preventing infection. Make sure you adhere to your surgeon’s advice to prevent issues and encourage optimal results.
What should I do if I notice redness or drainage after showering?
Call your doctor if you notice any atypical redness, swelling, or discharge. These can point to infection or complications and should be dealt with immediately.
Why is it important to care for my mind and body after liposuction?
Both physical care and emotional well-being encourage healing. A soothing shower can lift your spirits and ease discomfort. Self-care lessens stress and facilitates recovery.